Unity 2D: How to Stop Movement When Object Hits a Wall

Unity 2D: How to Stop Movement When Object Hits a Wall

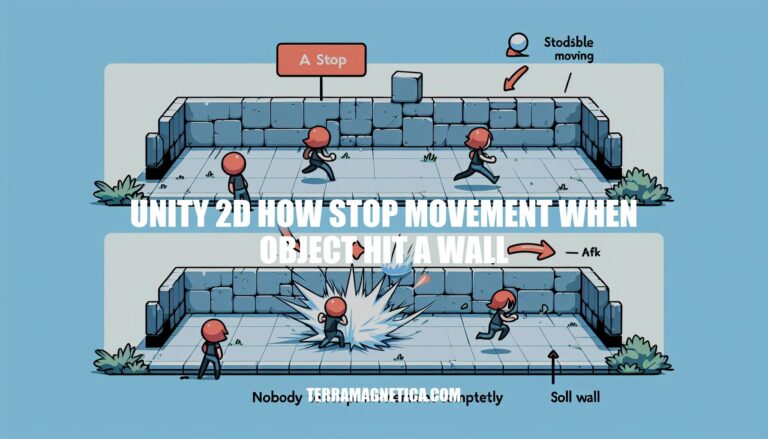
Imagine you’re immersed in the world of Unity 2D, navigating your object through a dynamic environment filled with walls and obstacles. The challenge lies in mastering the art of stopping movement when your object hits a wall, a crucial skill that can elevate your game development prowess. In this guide, we will delve into the intricacies of Unity 2D movement and explore effective techniques to halt movement seamlessly upon collision with a wall.

Get ready to unravel the secrets of optimizing movement control in Unity 2D!

Stopping Object Movement in Unity with 2D Wall Collision

When working with 2D movement in Unity, you can stop an object’s movement when it hits a wall by adjusting its velocity or handling collisions. Here are a few approaches you can consider:

  1. Adjusting Velocity:

    • If your object has a Rigidbody2D component, you can modify its velocity to stop movement when it collides with a wall.
    • In your FixedUpdate method, check if the object’s move variable is zero (indicating no ongoing movement).
    • If move is zero, accept new input for movement. Otherwise, continue with the existing movement.
    • When the object hits a wall, set move to zero to stop further movement.
    public class PlayerMoveScript : MonoBehaviour
    {
        float move = 0;
    
        void FixedUpdate()
        {
            if (move == 0)
            {
                move = Input.GetAxis("Horizontal");
                if (move != 0)
                {
                    move = 15 * Mathf.Sign(move);
                    rigidbody2D.velocity = new Vector2(move, rigidbody2D.velocity.y);
                }
            }
            else
            {
                rigidbody2D.velocity = new Vector2(move, rigidbody2D.velocity.y);
            }
        }
    }
    
  2. Handling Collisions:

    • Ensure that your walls have 2D Box Colliders (Static Colliders).
    • When the object collides with a wall, set its movement variables (moveHorizontal and moveVertical) to zero.
    • Allow the player to choose a new direction only once the object has completed its last movement.

2D Collision Detection in Unity

Unity provides several ways to handle 2D collision detection using colliders. Let’s explore some key concepts and approaches:

  1. Colliders in Unity:

    • A collider is a Unity component that defines the shape of a GameObject for the purposes of physical collisions.
    • Colliders are invisible and do not need to match the exact shape of the GameObject’s mesh.
  2. Types of Colliders:

    • Box Collider 2D: Represents a rectangular shape.
    • Circle Collider 2D: Represents a circular shape.
    • Polygon Collider 2D: Allows custom polygonal shapes.
    • Edge Collider 2D: Represents a line segment.
    • Composite Collider 2D: Combines multiple colliders into a single collider for efficiency.
  3. Continuous Collision Detection (CCD):

    • CCD helps prevent fast-moving objects from passing through each other.
    • When using rigidbodies, set the collision detection mode to Continuous for accurate collision handling.
    • However, keep in mind that CCD can be computationally expensive.
  4. Rigidbody.MovePosition() vs. Transform.Translate:

    • Both methods change the position of a rigidbody instantly.
    • Rigidbody.MovePosition() is commonly used for instant movement but can lead to issues with collisions.
    • Instead, consider modifying the rigidbody’s velocity for instant movement. This approach allows the physics engine to handle collisions more effectively.
  5. Common Issues and Solutions:

    • Passing Through Colliders:
      • If your colliders are too thin, objects may still pass through.
      • Consider adjusting the thickness of your barrier colliders.
    • Perpendicular Colliders Intersection:
      • Sometimes motion sticks to the intersection between perpendicular colliders.
      • Experiment with collider shapes and sizes to find a better fit for your game.
    • Scaling and World Units:
      • Ensure your game’s scale is reasonable. 18 world units in 0.5 seconds might be too extreme.
      • Consider adjusting the scale or velocity of your character.

Remember that colliders

The image shows a perspective view of a curved surface with parallel lines projecting from a point on the surface.

IMG Source: discourse-cdn.com


Stopping Movement Upon Collision in Unity 2D

To stop movement upon collision in Unity 2D, you can follow these approaches:

  1. Rigidbody Velocity Adjustment:

    • Instead of using transform.Translate(), which teleports the player to new coordinates, consider adding a Rigidbody2D component to your player.
    • Modify movement using .velocity or .position to account for physics during movement.
    • Example code snippet:
      void Update()
      {
          // Assuming you have a Rigidbody2D component named 'rbody'
          rbody.velocity = rbody.velocity * 0.9f; // Custom friction
          if (Input.GetKey(KeyCode.W))
              rbody.AddForce(Vector2.up * speed);
          if (Input.GetKey(KeyCode.S))
              rbody.AddForce(Vector2.down * speed);
          // ... other movement inputs
      }
      
  2. Collision Handling:

    • In your OnCollisionEnter2D method, set the isKinematic property of the rigidbody to true to stop all movement.
    • If you want to avoid bounciness, create a new PhysicsMaterial2D and set its bounciness to 0.
    • Alternatively, you can manually set the velocity to zero in OnCollisionEnter2D.

The image shows a screenshot of the Unity game engine.

IMG Source: unity3d.com


Strategies for Handling Multiple Collisions in Unity 2D

Handling multiple collisions in Unity 2D can be a bit tricky, but there are several strategies you can employ. Let’s explore a few approaches:

  1. Using Lists of Colliders:

    • Your initial idea of adding colliders to a list when they collide and removing them when they exit is a valid approach. However, you mentioned that it didn’t work as expected for three simultaneous collisions. Here’s how you can improve it:
      • Maintain a list of colliders that the circle is currently interacting with.
      • When a collider enters the trigger area, add it to the list.
      • When a collider exits the trigger area, remove it from the list.
      • To handle multiple simultaneous collisions, keep track of the colors associated with each collider in your list. When the circle exits a collider, check if it’s still interacting with other colliders. If not, change its color back to the default.
    • Remember that this approach works well for a moderate number of simultaneous collisions.
  2. Physics2D Overlap Functions:

    • Unity provides functions like Physics2D.OverlapCircleAll and Physics2D.OverlapBoxAll that allow you to detect multiple collisions.
    • For circles and rectangles, you can use Physics2D.OverlapCircleAll to find all colliders within a circular area around the circle. Similarly, Physics2D.OverlapBoxAll can be used for rectangular areas.
    • These functions return an array of colliders that intersect with the specified shape. You can then process these colliders to determine the combined color for the circle.
  3. Advanced Collision Handling:

    • If you need more precise control over collision resolution, consider using the ComputePenetration method. This method calculates the minimal translation vector needed to separate colliders that are overlapping.
    • Example usage:
      // Assuming you have a direction and distance
      Vector2 direction = ...; // Direction of separation
      float distance = ...; // Distance to separate colliders
      transform.position += direction * distance;
      
    • This method can help you handle complex scenarios where multiple colliders are involved.

Sources:

  1. Stack Overflow: Detect collision of more than 3 gameObjects at the same time in Unity
  2. Unity Forum: Collision handling; dealing with multiple collisions

A sprite is colliding with a single tile.

IMG Source: imgur.com


Unity 2D Movement Optimization

Let’s delve into Unity 2D movement, specifically addressing the issue of stuttering and optimizing the system. I’ll provide some insights and suggestions to enhance your player movement experience.

  1. Stuttering Movement Issue:

    • You mentioned that when suddenly changing direction (e.g., from up to left), the character stutters and doesn’t move smoothly without releasing all keys first.
    • The root cause lies in how you handle key inputs and velocity adjustments.
  2. Optimization and Improvements:

    • Instead of setting the velocity to zero every time a key is lifted, consider modifying only the relevant component of the velocity vector. This way, you won’t abruptly stop the character’s movement.
    • Utilize Input.GetAxis for smoother input handling. It simplifies the process and provides better control over movement.
    • Here’s an improved version of your movement script:
using System.Collections;
using System.Collections.Generic;
using UnityEngine;

public class MoveChar : MonoBehaviour
{
    Rigidbody2D rigid;
    public float Speed;

    void Start()
    {
        rigid = GetComponent();
    }

    void Update()
    {
        float horiz = Input.GetAxis("Horizontal");
        float vert = Input.GetAxis("Vertical");

        // Modify velocity based on input
        rigid.velocity = new Vector2(horiz * Speed, vert * Speed);
    }
}
  1. Explanation:

    • We use Input.GetAxis to get the horizontal and vertical input values (-1 to 1).
    • The rigid.velocity is directly set based on these input values, ensuring smooth movement.
    • No need to set velocity to zero explicitly; it will naturally stop when keys are released.
  2. Additional Tips:

    • Consider adding acceleration and deceleration for more realistic movement.
    • Optimize physics calculations by adjusting FixedUpdate instead of Update.
    • Profile your game to identify performance bottlenecks and optimize accordingly.

: Stack Overflow: Stuttering movement in Unity 2D
: Stack Overflow: Stop building momentum when running into a wall (2D Top-Down)
: Unity Discussions: Add acceleration and deceleration for top-down 2D movement
: Stack Overflow: Unity 2D stop moving while attacking
: YouTube: Performance optimization tips: Physics in Unity

The profiler shows the performance of a Unity game, with the CPU usage, GPU usage, rendering, and other information.

IMG Source: unity.com


In conclusion, mastering the art of stopping movement when an object hits a wall in Unity 2D is a pivotal skill for any game developer. By leveraging the power of Rigidbody adjustments, collision handling, and advanced collision detection mechanisms, you can enhance the player experience and elevate the overall quality of your game. Remember, Unity offers a plethora of tools and techniques to fine-tune your movement control, allowing you to create immersive and polished gameplay.

So, dive deeper into the world of Unity 2D, experiment with different approaches, and watch as your games come to life with seamless and impactful movement mechanics. With dedication and practice, you can conquer the realm of Unity 2D and craft extraordinary gaming experiences that captivate players worldwide!

Comments

    Leave a Reply

    Your email address will not be published. Required fields are marked *